OK, so I've been doing all-grain for a while now, and have been looking for new ways to improve the quality of my brews. The things I've identified are: making starters, better oxygenation of wort, better temperature control (the peltier thermoelectric fermentation chamber turned out to be a bit under-powered, but we'll save that for another post). I think making starters will have the greatest impact on my beer quality, and it may also save me money since, at the same time, I think I may start "washing" and re-using yeast, which is by far the most expensive ingredient. I've done small starters before, using a mason jar covered w/ foil that I just shake periodically, but I'm looking to do a little better, so I built a stir-plate. Parts list as follows:
(1) computer fan
(1) potentiometer
(1) DC spst lighted switch
(1) dial knob
(1) cigar box
(1) DC adapter
(4) bolts w/ nuts
(4) nylon washers
(2) neodymium (rare-earth) magnets
hot glue
(1) teflon magnetic stir bar
I bought all of the electrical components, switches, knobs, etc at radioshack. I picked up the wooden cigar box for free from my local liquor store. And, I found an old DC adapter in my box of wiring junk. I bought the magnets at Ace Hardware, and I bought the stir bar at Austin Homebrew Supply.
I drilled four holes in the top of the cigar box for mounting the fan, and holes in the front for the switch and speed knob.
The fan is mounted on the under-side of the box lid. The two rare-earth magnets are hot-glued to the spinning hub of the fan. Notice I ended up using a different fan than what I started with. The first one spun too quickly, and kept throwing the stir-bar.
Success!
My first yeast starter on the stir-plate!
Showing posts with label builds. Show all posts
Wednesday, March 28, 2012
Sunday, July 3, 2011
New Immersion Chiller
So, given the oppressive heat here, and the difficulty I've been having chilling my wort post-boil, I thought it might be time to build a new immersion chiller. Went to Home Depot and bought 50' of copper pipe. Carefully wrapped it around a plastic bucket. Then attached some vinyl tubing with some hose clamps and some hose adapters on the ends. I think it turned out pretty good!
Mash Tun Build
I built the MLT from a 10 gal Home Depot beverage cooler, a cooler bulkhead kit with a stainless steel ballvalve, and a stainless steel braided hose to filter the wort, from bargainfittings.com. I drilled some holes in the lid and filled it with great-stuff expanding foam to make it more insulative.
Cheap Mash Paddle
Getting ready to make my move to all-grain, and thought I'd better make a mash paddle. Fortunately, I found just the thing at Academy Sports; it's a wooden crawfish paddle. I cut a few holes in it with a hole saw and sanded it down nice and smooth. I'd eventually like to make something a little nicer, but this should get the job done just fine for now. While I was there, I also picked up a propane fryer stand so I can boil 5+ gallons of wort at one time!
Wednesday, April 27, 2011
Peltier Thermoelectric Fermentation Chamber
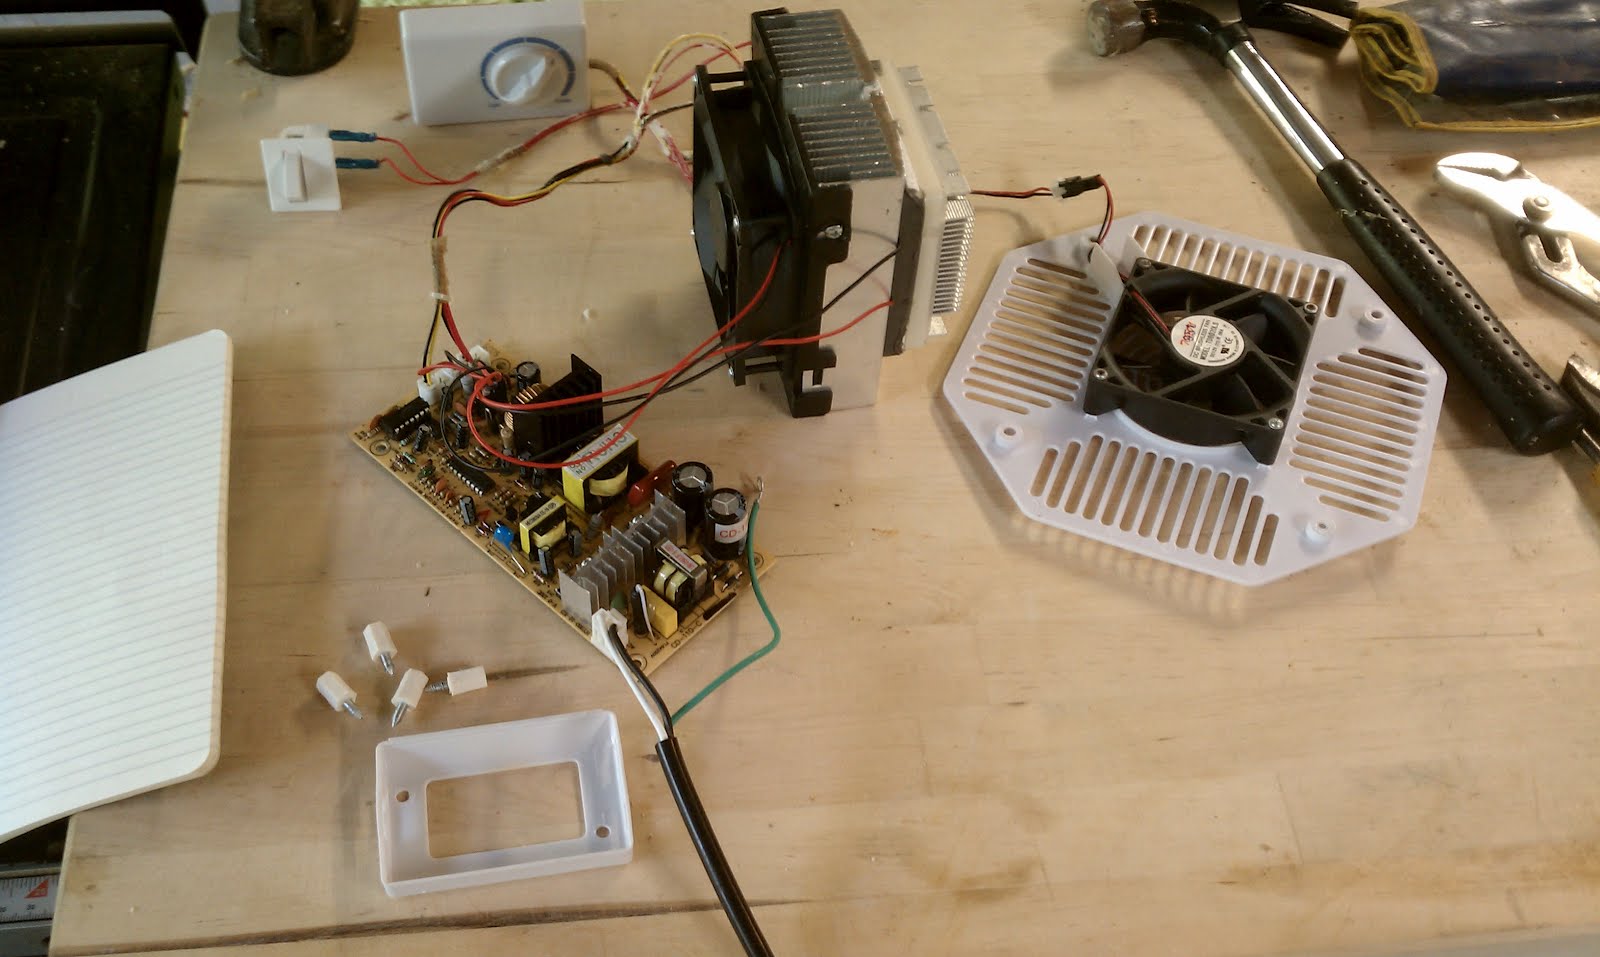
OK, so this will be my first equipment build. Houston stays pretty warm during the summer months, so if I'm going to have any success brewing in the summer, I'm gonna need some way to keep my brew cool. I picked up a cheap mini-fridge on craigslist. The plan was to carefully remove the compressor and cooling lines, and install them in a larger, insulated box. But, when I got it home, I discovered that it is not your standard cooling system; this unit has what is called a peltier device. Basically, there is no compressor, and no coolant. There is just a metal plate which, when a current is applied to it, gets cold on one side of the plate, and hot on the other. The idea is to build an insulated box, and mount the peltier on the back wall of it, with some fans to move the cold air around. I'm sizing the chamber so that it could hold up to 3 carboys at one time, so that I could have one active brew, and a couple aging.
OK, now that the goods are removed from the fridge, it's time to build the new box. I built the frame out of 2x2s and 1x2s.
I had to rig up some sort of drain to deal with condensation, since water dripping down the inside would eventually ruin the particleboard interior. So, I cut a piece of pvc pipe in half to catch the condensation, and ran a small vinyl drain line through a hole in the pvc to a drain pan on the back of the chamber.
The circulation fan attaches in front of the cold-side of the peltier to keep air moving over it, and cooling the air inside the fermentation chamber. The temperature control knob will be attached to the back wall of the chamber, left of the fan. It doesn't need to be terribly accessible, since it will always be set to maximum cold, and the temperature will be controlled by an external controller.
The external controller affords much greater precision and accuracy in controlling the temperature, and also allows me to use both heat and cooling, depending on the ambient temperature. Installing a heater, whether it's a brew-belt, or warming blanket, will be as simple as plugging it into the second outlet.
Each wall of the box is insulated with 2 layers of 1" thick, aluminized rigid foam insulation board. I believe it was R5. The interior was then lined with plasticized masonite, in the hopes it would be somewhat moisture resistant. I caulked all of the joints, and put a gasket around the door opening.
The light switch is mounted just inside the door opening, and I attached a paddle to the door to depress the switch when the door is closed.
The temperature probe is at the end of a long wire, which I can tape to the side of a carboy to get an accurate read of the beer temperature.
I screwed the cover from the back of the mini-fridge onto the back to cover the circuit board and fan. Finally, I put some casters on the bottom, and a couple pull-latches to keep the door closed tight.

7/6/13 update: The peltier used to cool this chamber turned out to be a bit under-powered. When I tried to use it in my garage in the summer, I had to put frozen bottles of water inside to help try to keep it cool. I've decided I'm going to rebuild this using a conventional compressor and coil type unit. For now, I've just attached my temperature controller to an old minifridge. Will post more on this when I start my new build.
OK, now that the goods are removed from the fridge, it's time to build the new box. I built the frame out of 2x2s and 1x2s.
![]() |
| This is a shot from the front - the small boxed-in area in the back is where the peltier will go, as you can see in the next picture. |
I had to rig up some sort of drain to deal with condensation, since water dripping down the inside would eventually ruin the particleboard interior. So, I cut a piece of pvc pipe in half to catch the condensation, and ran a small vinyl drain line through a hole in the pvc to a drain pan on the back of the chamber.
The circulation fan attaches in front of the cold-side of the peltier to keep air moving over it, and cooling the air inside the fermentation chamber. The temperature control knob will be attached to the back wall of the chamber, left of the fan. It doesn't need to be terribly accessible, since it will always be set to maximum cold, and the temperature will be controlled by an external controller.
![]() |
| External temperature controller. |
The external controller affords much greater precision and accuracy in controlling the temperature, and also allows me to use both heat and cooling, depending on the ambient temperature. Installing a heater, whether it's a brew-belt, or warming blanket, will be as simple as plugging it into the second outlet.
![]() |
| Top outlet for cold, bottom for hot. |
Each wall of the box is insulated with 2 layers of 1" thick, aluminized rigid foam insulation board. I believe it was R5. The interior was then lined with plasticized masonite, in the hopes it would be somewhat moisture resistant. I caulked all of the joints, and put a gasket around the door opening.
The light switch is mounted just inside the door opening, and I attached a paddle to the door to depress the switch when the door is closed.
The temperature probe is at the end of a long wire, which I can tape to the side of a carboy to get an accurate read of the beer temperature.
I screwed the cover from the back of the mini-fridge onto the back to cover the circuit board and fan. Finally, I put some casters on the bottom, and a couple pull-latches to keep the door closed tight.
7/6/13 update: The peltier used to cool this chamber turned out to be a bit under-powered. When I tried to use it in my garage in the summer, I had to put frozen bottles of water inside to help try to keep it cool. I've decided I'm going to rebuild this using a conventional compressor and coil type unit. For now, I've just attached my temperature controller to an old minifridge. Will post more on this when I start my new build.
Subscribe to:
Posts (Atom)